
How to turn audio into text
Written by the team that builds Cassette, so we are not neutral about it. Updated 17 November 2026.
If you have Microsoft 365, open a document in Word for the web, go to Home, then the Dictate menu, then Transcribe, and choose Upload audio. Word reads MP3, M4A, WAV and MP4 files and writes a transcript with each speaker apart. If the recording is still in Voice Memos or a phone's recorder app, that app may already have a transcript. For a transcript and notes on your iPhone, iPad or Mac, bring the file into Cassette: share it to Cassette and open Cassette, press ADD FILE on the Shelf, or drag it onto the Shelf on a Mac. It becomes a tape, and Cassette writes the transcript and the notes.


First, check where the recording is
You may not need to move the file at all.
- In Voice Memos or a phone's recorder. Voice Memos on iPhone 12 or later, Pixel's Recorder and Samsung's Voice Recorder can write a transcript of their own recordings, on the phones and in the languages they support. Our guide to transcribing voice memos has the steps for each.
- A file somewhere else. A recording from another app, a file someone sent you, a lecture or interview saved as an MP3: that is what the rest of this guide is for.
With Microsoft 365: Transcribe in Word
Word for the web can turn an uploaded file into text. Microsoft's page on transcribing your recordings lists these steps.
- Sign in to Microsoft 365 in Microsoft Edge or Chrome, and open a document in Word for the web.
- Go to Home, open the Dictate menu and choose Transcribe.
- In the Transcribe pane, choose Upload audio and pick the file. Word takes .wav, .mp4, .m4a and .mp3.
- Keep the pane open while it works. Microsoft says it can take up to about the length of the recording.
- Choose Add all to document to put the whole transcript in the page, or add one section at a time.
Things to know first. Word for Windows has it too for work accounts. It needs a Microsoft 365 subscription and an internet connection, and Microsoft sets a limit of 300 minutes of uploaded audio a month. Your file is sent to Microsoft to be transcribed and saved in a Transcribed Files folder in your OneDrive. Speakers are labelled Speaker 1, Speaker 2 and so on, which you can rename. What you get is a transcript: the summary and the to-dos are still yours to write.
On iPhone, iPad or Mac: bring the file into Cassette
Cassette is a recorder that looks like a tape deck. It can also take a recording you already have and treat it like a tape it made itself, with a transcript and notes.
- On iPhone or iPad, open the file in Files, Voice Memos or the app it is in, tap Share, choose Cassette, then open Cassette. Or open Cassette and press ADD FILE on the Shelf, then pick the file.
- On a Mac, drag the file onto the Shelf, or click ADD FILE. A long recording dragged straight from Voice Memos has to go to the Desktop first. Drag it there, then drag it from the Desktop onto the Shelf.
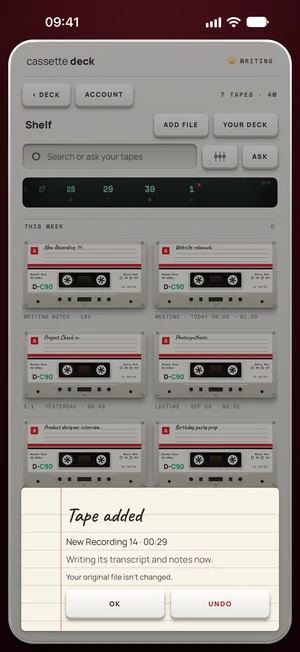
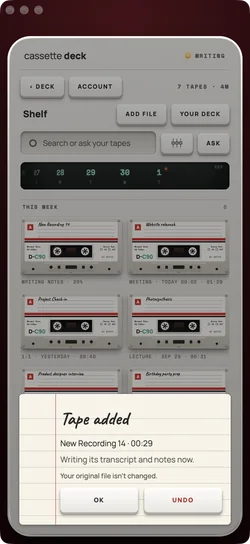
Cassette reads M4A, MP3, WAV, AAC, FLAC, Opus and the sound in MP4. It keeps its own copy, so your original file isn't changed, and the tape carries the file's name until the notes give it a title. A note on the deck says the tape was added, with UNDO if you picked the wrong file.
If a tape is recording, ADD FILE asks you to stop it first. A file shared or dropped meanwhile waits until you press STOP, then gets written up.
Free to download. Recording is free and unlimited, and tapes under 3 minutes get their transcript and notes free.
Get the text out
Open the tape and choose TRANSCRIPT. Each line has its time on the tape beside it. Tap a line to go to that moment, then press PLAY to hear it.
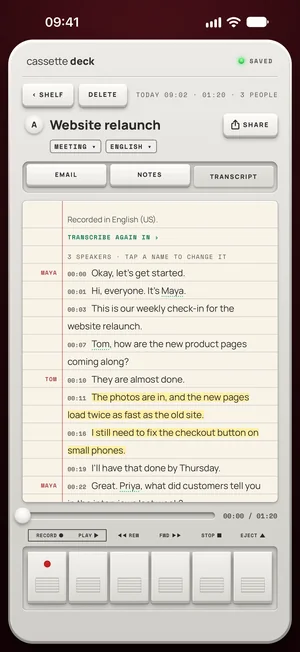
- Copy it. On the TRANSCRIPT tab, tap SHARE and choose Copy, then paste it wherever you want.
- Save it as a file. The same sheet has Save as PDF and Save as Word.
- Wrong language? A file is heard in the language you speak, as set in your Cassette profile, or, if you list more than one, in whichever of them it hears. If it got it wrong, tap TRANSCRIBE AGAIN IN at the top of the transcript and pick the right language.
The notes Cassette writes from the file
A transcript of an hour is a lot of reading. Cassette also picks the kind of notes from what it hears: a meeting gets what was decided and who is doing what, a lecture gets an outline and key terms, an interview gets each question with its answer, and a voice note gets your to-dos. If it picked the wrong kind, tap CHANGE beside Type at the top of the notes and choose another, and the notes are written again.
From there you can send the notes to Notion, OneNote, Evernote, Google Keep or Apple Notes, and ask your tapes a question later.
Full notes depend on the device. An iPhone, iPad or Mac without Apple Intelligence or on a version before 26 gets the recording, the transcript and a few lines heard clearly, with no summary, to-dos, outline, terms, review cards or template choice.
Get a cleaner transcript from any tool
- Start from the best copy. A file that has been sent through a chat app a few times may be squeezed. Use the original if you can.
- Check names and numbers first. They are where speech to text slips most, so look at them before you share the text.
- Listen where it matters. If a line looks wrong, go to that moment and hear it. The recording is how you settle it.
Before you record
Ask first. Whoever you are recording should know about it, some places require everyone's consent, and it is the decent thing to do.
Questions
Can I turn an MP3 into text on my iPhone?
Yes. Share the MP3 to Cassette from Files or the app it is in and open Cassette, or press ADD FILE on Cassette's Shelf. It becomes a tape, and Cassette writes its transcript and notes. The original file isn't changed.
Is it free?
In Cassette, a file under 3 minutes gets its transcript and notes free. Longer files count toward the 2 free tapes a month, the same as tapes you record, and Premium covers the ones after that. Word's Transcribe comes with a Microsoft 365 subscription.
Does my recording leave my device?
In Word, yes: Microsoft says the file is sent to Microsoft to be transcribed and saved in your OneDrive. In Cassette, if your device can't transcribe the file's language itself, the recording may be sent to Apple to transcribe. On version 27, the notes can be written on Apple's Private Cloud Compute. On iPhone and iPad, tapes are also in iCloud and computer backups if you have them on, and on every device in your backup if you sign in with Premium. To stop all of that, turn on On-device only in your Cassette profile.
Keep reading
- All featuresWhere this fits in Cassette.
- How to transcribe voice memos to text on iPhone or AndroidTurn a voice memo into text with the tools already on your phone. Steps for iPhone, Mac, Pixel and Samsung, and how Cassette adds a to-do list.
- An interview transcription app that writes the notes tooRecord an interview on your phone and get a transcript plus notes with each question and answer, quotes and follow-ups. Built-in apps and Cassette.
- How to record and transcribe a meeting, with no bot in the callRecord and transcribe a meeting on iPhone, Android or Mac, in a room or on a call: what Zoom, Teams and Meet do, and how Cassette does it with no bot.
- How to record lectures on iPhone, Android, iPad or MacThe best way to record lectures on a phone, iPad or laptop, and get notes you can study from. Steps with the free built-in apps and with Cassette.
Sources
- Microsoft Support: Transcribe your recordings: https://support.microsoft.com/en-us/word/transcribe-your-recordings
- Apple Support: View a Voice Memos transcription on iPhone: https://support.apple.com/guide/iphone/view-a-transcription-iph00953a982/ios
Free to download. Recording is free and unlimited, and tapes under 3 minutes get their transcript and notes free.